Each of us can look back on our photographic journey and find moments or experiences that were foundational and inspirational. It could have been the change from film to digital cameras. It could have been a deep learning experience by attending a workshop or learning new skills and techniques. For me, the a-ha moment was in 2017 when I was introduced by chance to infrared photography. I was quickly mesmerized by the dreamy and otherworldly representation of the images with the use of infrared filters.
I was instantly inspired by the deep contrasts and colours captured in the articles that I researched. The dark black/dark blue skies paired with pure white trees and landscapes created vivid stories that were instantly attractive to my eye. It was not long before I purchased my first infrared filter and began experimenting with it.
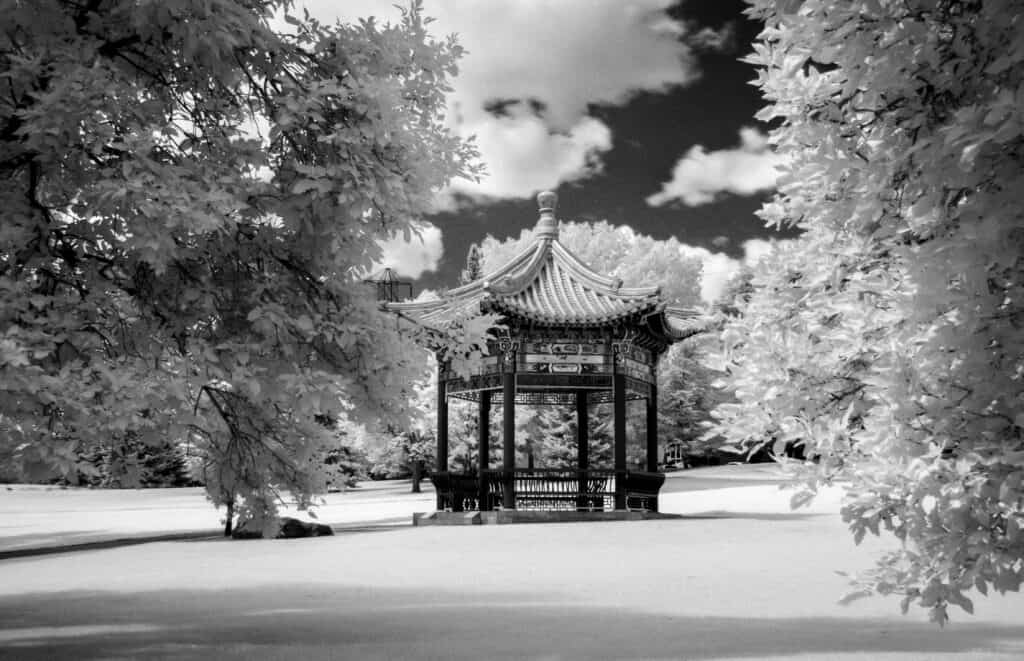
*Victoria Park Pagoda, Saskatoon Sk. First infrared photo. Black and white conversion.
Infrared photography can be challenging and frustrating. My first infrared system was a Nikon d7000 with an 18-200mm lens and the R72 Hoya infrared filter. Each image needed to be created with the camera mounted on a tripod because of the filter. The filter significantly impacted shutter length and most images needed 10-30” for an adequate exposure time. I would focus the lens and then gently screw on the filter in the last step. The slow process was time-consuming and temperamental. As I continued to experiment, I learned the ideal weather conditions for infrared. Saskatchewan, ”The Land of the Living Skies”, provided constant opportunities to explore and photograph infrared scenes.
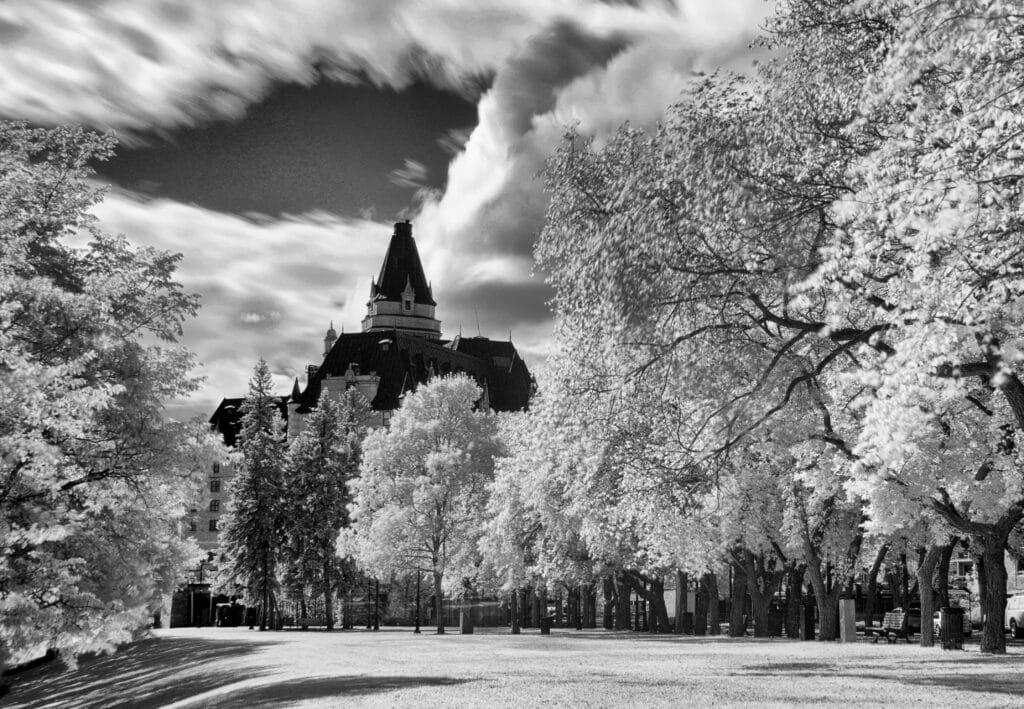
*Kiwanis Park and the Bessborough Hotel, Saskatoon Sk. Black and white conversion.
Alberta and Saskatchewan provided endless opportunities to photograph abandoned homesteads. I would explore the grid roads and maps looking for spots to create high contrast images. The infrared setup was perfect to create images during the daytime hours as I travelled between Calgary and Saskatoon. As I explored the landscapes, my goal was to create totally different scenes of popular locations. My editing preference would be a high contrast black and white conversion which accentuated the pure white trees and detail.
Over time, I found channel swapping techniques to be fun interpretations as well. There are numerous sources online discussing the technical aspects of filters and the editing process.
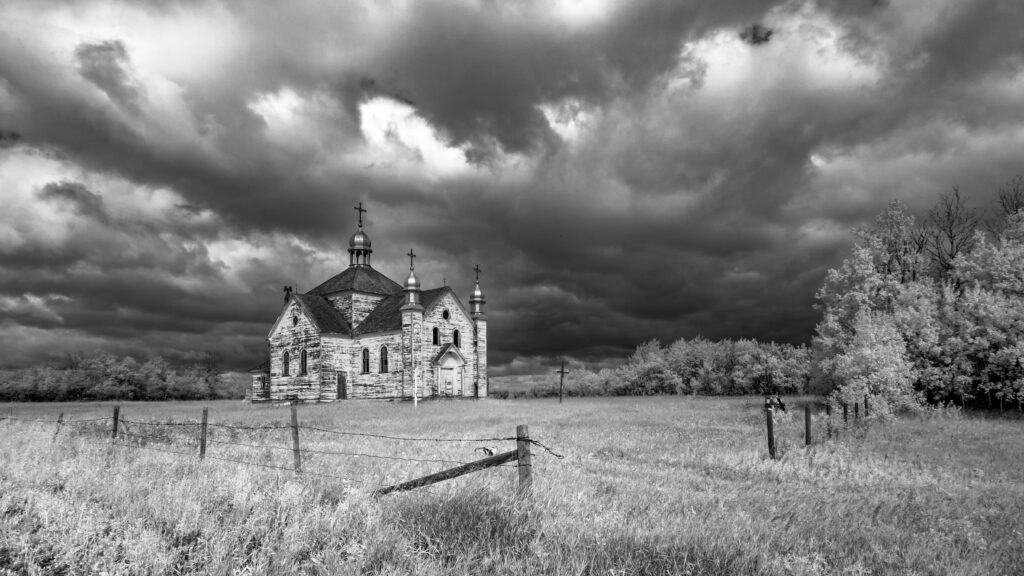
*Holy Ghost Ukrainian Catholic Church, Plainview, SK. Black and white conversion.
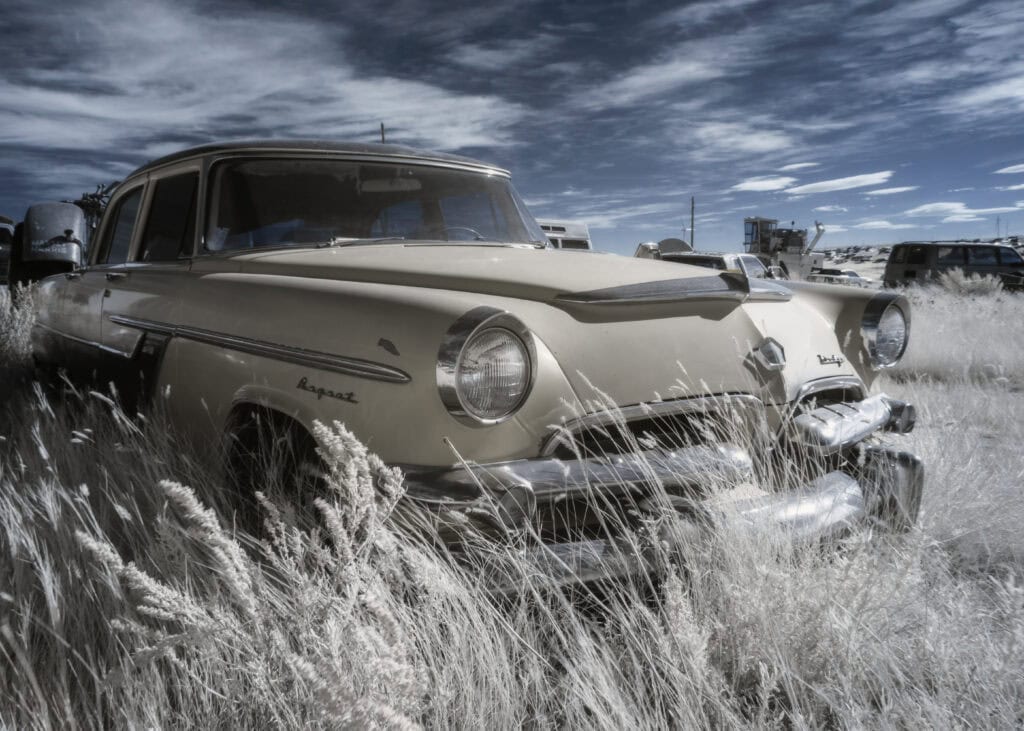
*Abandoned car, Alberta. Channel swapped to maintain a blue sky.
After several years of using the R72 filter, I expanded my camera bag, purchased additional filters of different wavelengths that create different colour combinations and had an older camera body converted to a full spectrum camera. The converted camera body gives the flexibility to shoot through live view and has shorter exposure times. With gear improvements, I have continued to create infrared photos as often as possible, wherever I travel.
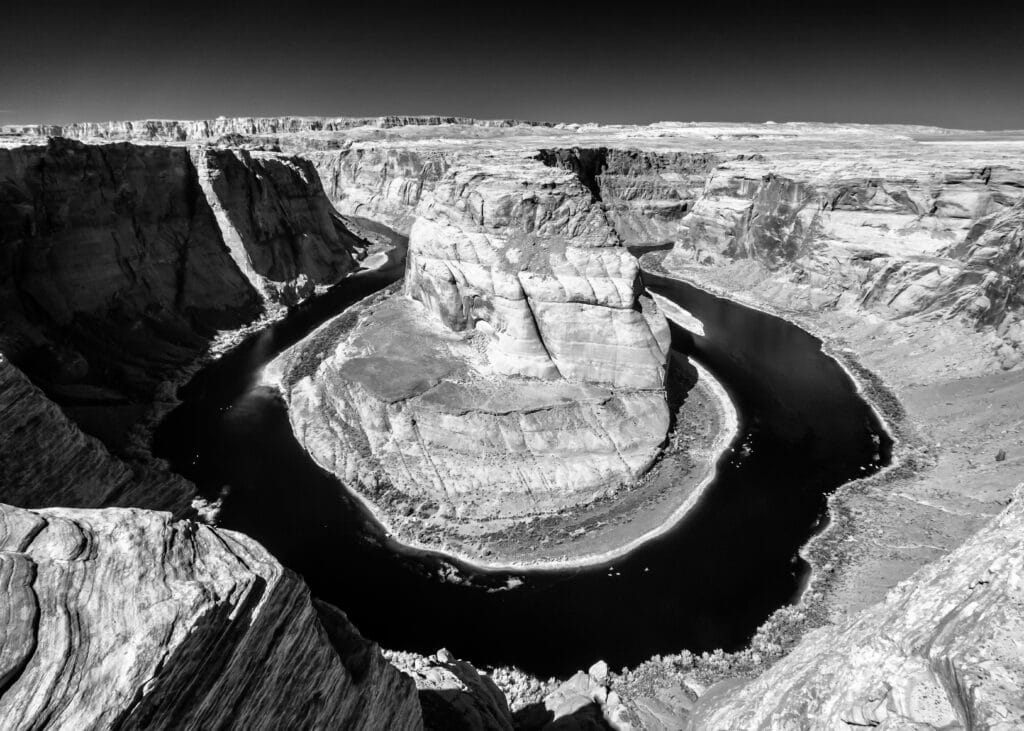
*Horseshoe Bend, Arizona. Black and white conversion.
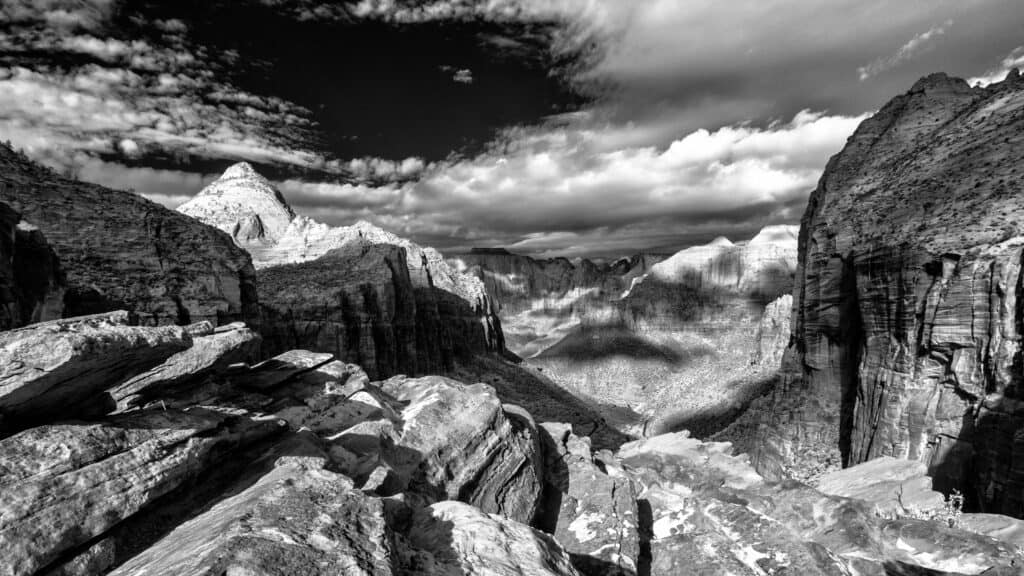
*Zion National Park, Utah. Black and white conversion.
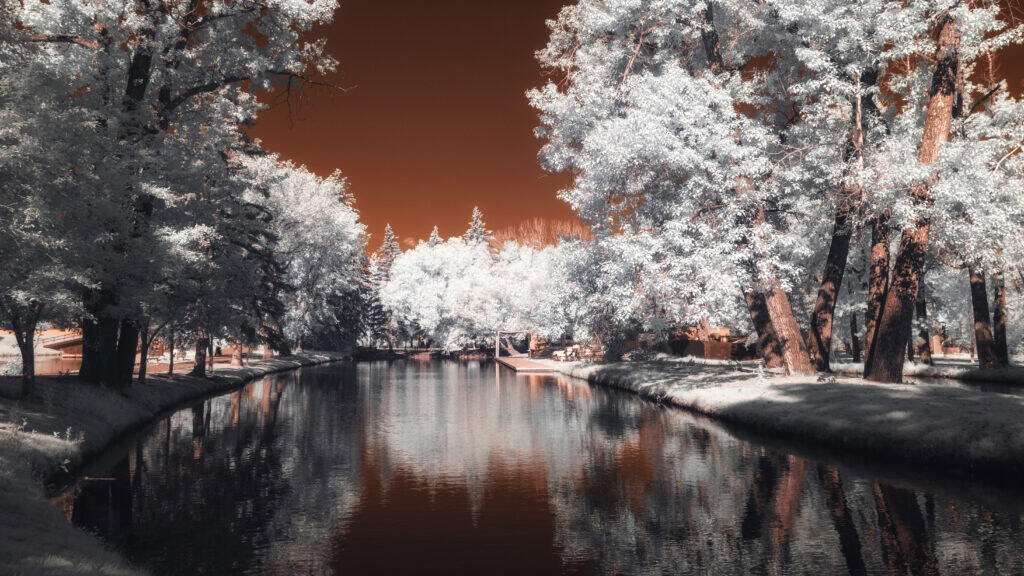
*Bowness Park, Calgary, Ab. Channel swapped to create a red sky.
Infrared photography has provided me with an opportunity to explore the world and create my own interpretations of our public parks, cityscapes and landscapes. I can edit the images however I choose and create my own story providing me with tremendous freedom. Infrared photography allows me to explore scenes during the mid-day and afternoons to maximize the sunshine and the glowing effect of the vegetation. My default edit style is often to create high contrast black and white images. The texture and detail across the scenes is much more intricate then regular black and white images.To some, the colour combinations in channel swapped images can be weird and funky, which is the exact reason that I love it.
*All images are courtesy of Dan Sigouin