After you have learned some of the basics of editing, then you can start to play. One place to start is Blend Modes.
Blend Modes
Blend Modes are useful tools that add creative effects to images. When applying blend modes to layers, creators can control the combination of brightness, colour, and contrast of the layers in an image. The display of the resulting effect of the chosen blend mode can be modified further by using the opacity control of the layer. These modifications to the layers are non-destructive and can be changed at any time.
For the full description of each blend mode, please refer to the Adobe Photoshop help section and search “Blending Mode Descriptions.” The website describes how each mode functions and highlights the complex interaction that takes place between the layers. There are numerous examples of blend mode uses in Youtube as well.
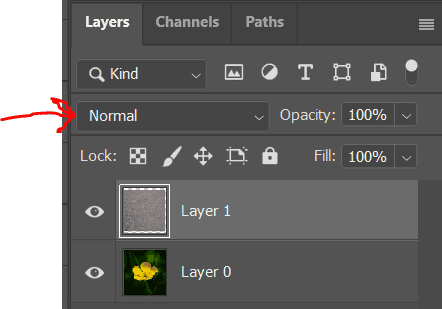
At the top of the layers panel labelled with the word “Normal” with a down arrow beside it. When selecting the dropdown arrow, the menu expands and displays all the different blend modes that can be used within the file.
To begin with, open two photos in Photoshop and combine them within one image file. There are many ways that separate files can be merged into a single file and the Move tool is the most common. There is no limit to how many images can be combined into a single file. All these images will be displayed in the new image as separate layers in the image panel. The order of the layers can be changed by moving them up and down within the document.
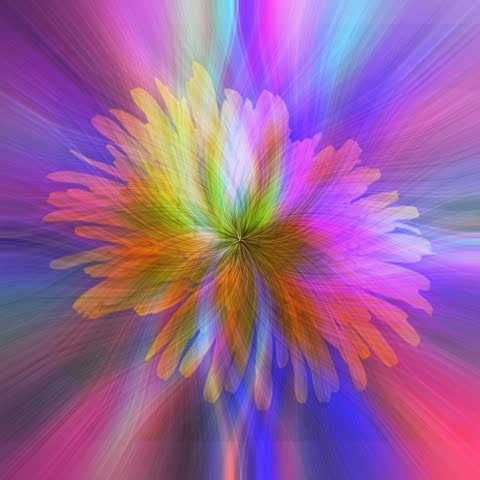
In my example I have used a picture of a flower and a texture layer which is just a photo of gravel in a parking lot. The order of the layers is important to maintain. The flower will be the base layer on the bottom, and the gravel texture will be the blend layer on top. Ensuring that both layers are unlocked and visible you can scroll through the list of blend modes on the gravel layer, reviewing each result created by Photoshop. The full screen preview helps to see the effect on the full image. It can be modified further by adjusting the Opacity of the blend which is taking place on the texture layer. When the preview of each blend mode is completed, save the selection in the layers panel. The creative choices with these tools are endless and they are nondestructive. You can come back and change the image at any time by selecting a different blend mode or starting over from scratch, all depending on my tastes at the time.
Here are my original photos.


These instructions are a place to begin but you can play with both the filters and blend modes to get different effects until you find photos you really like. Here is a photo that combines both techniques: